It may take a few tries and a bit of experimenting to apply the lashes at first, but you will get the hang of it in no time!
Step 1 - Separate Your Lashes
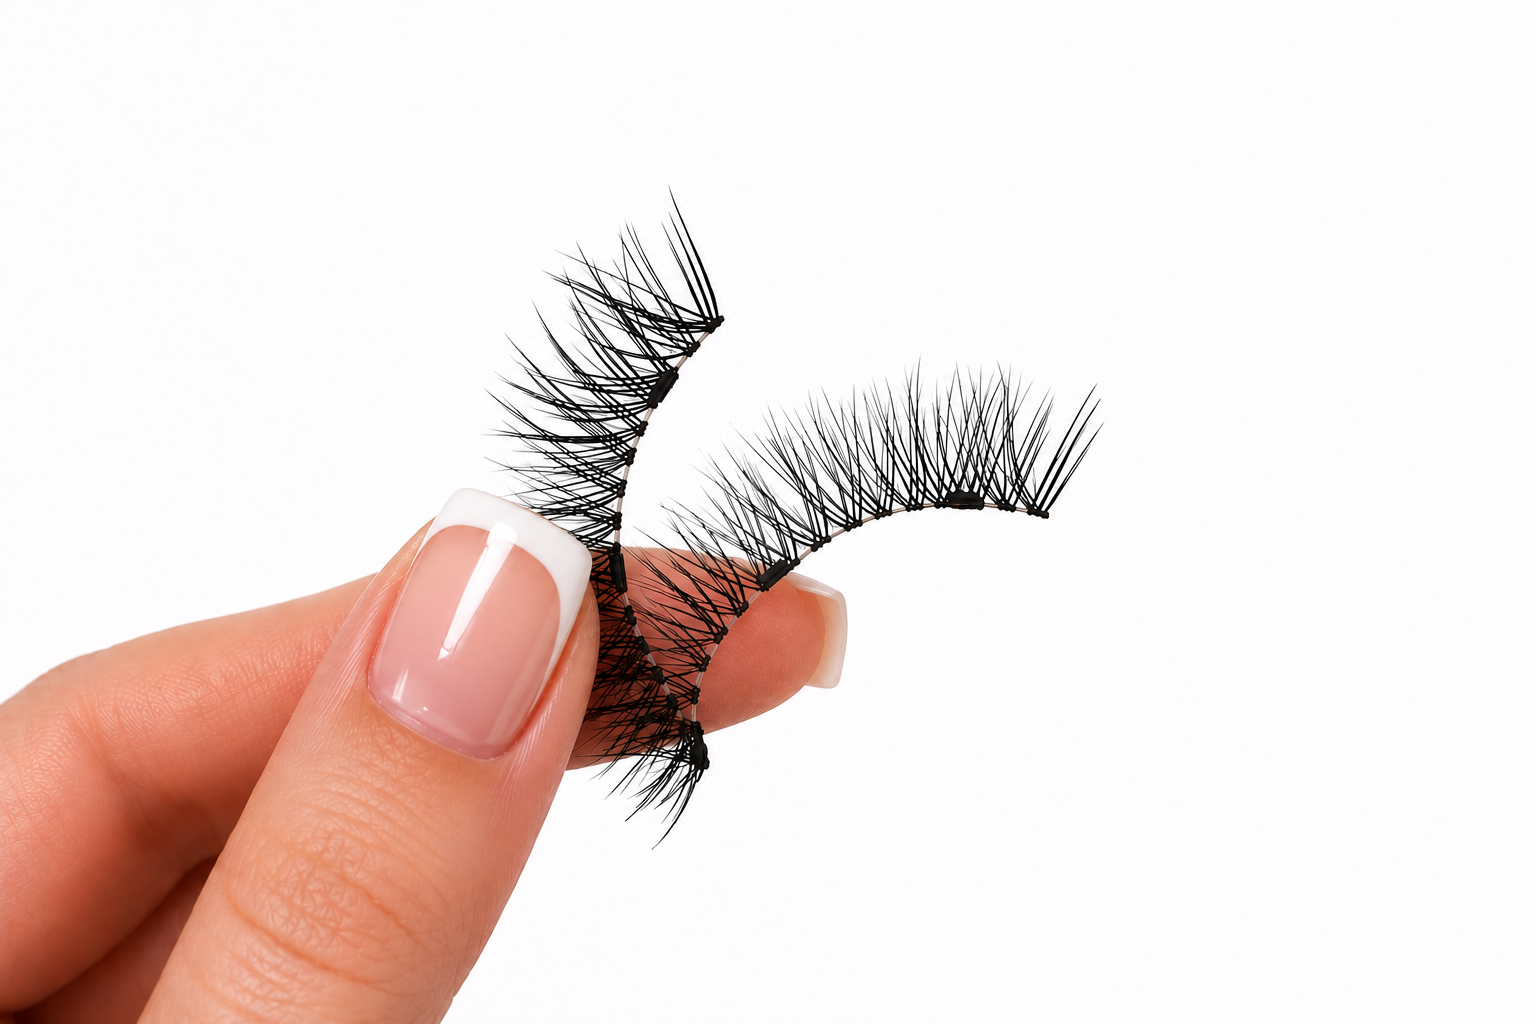
- Pick up a lash from one side of the case.
- Hold the magnetic section between two fingers and gently slide in opposite directions to separate the magnets.
- You should have two pieces now, these will be used to clamp onto your eye!
TIP: It is important that you do not pull the magnets directly apart in opposite directions as this may loosen the magnets over time.
Step 2 - Place Lashes on Applicator
- Place your lashes onto the applicator as shown below:
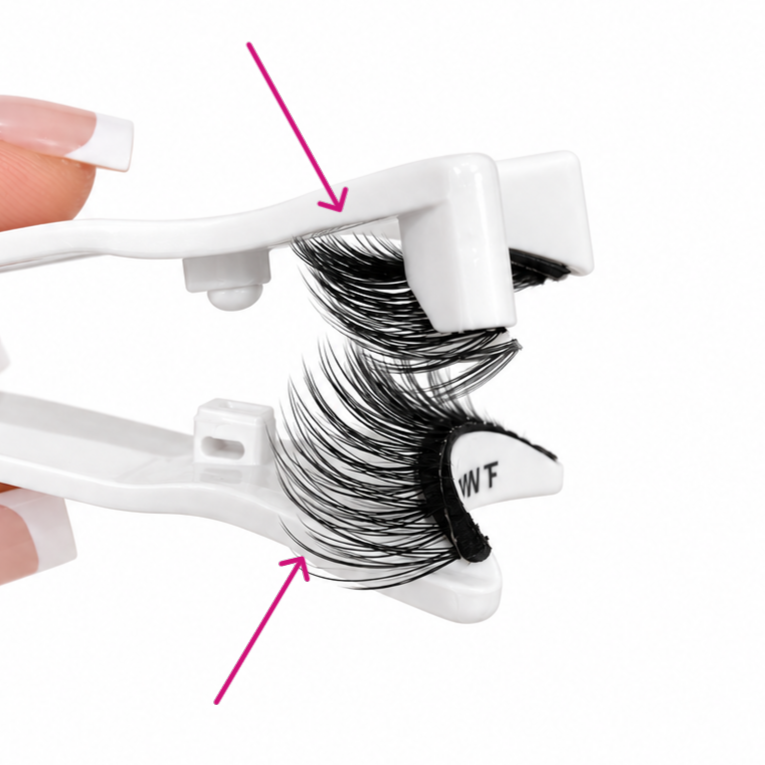
TIP: It is important both lash pieces curve upward, following the natural curve of your real eyelashes.
Step 3 - Ensure Correct Lash Placement
Look closely at your lashes. The thicker side of the magnet must be facing away from the magnetic strip on your applicator as shown below:
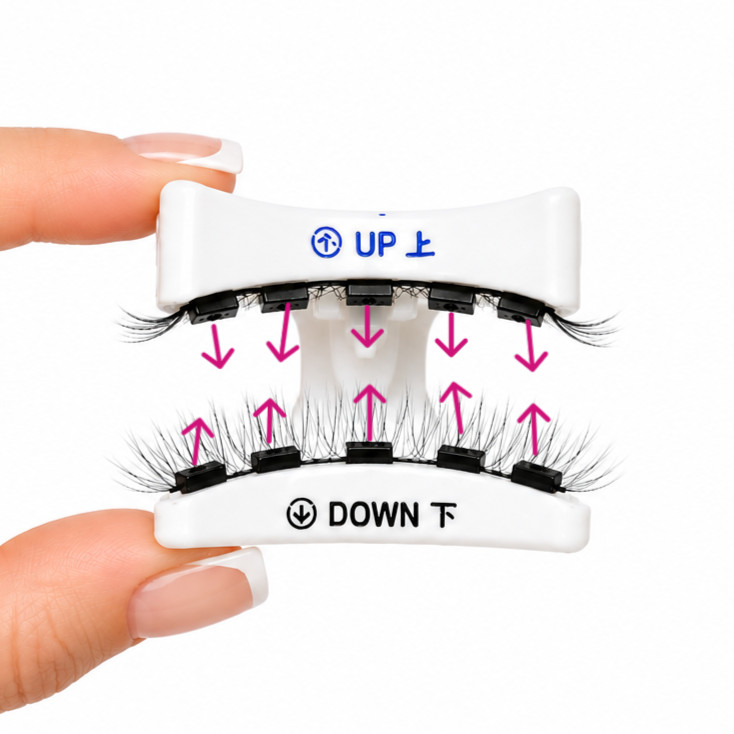
NOTE: The magnets are dramatised to demonstrate this step.
IMPORTANT: Please follow this step carefully, or else the magnets won't attach!
Step 4 - Align and Press
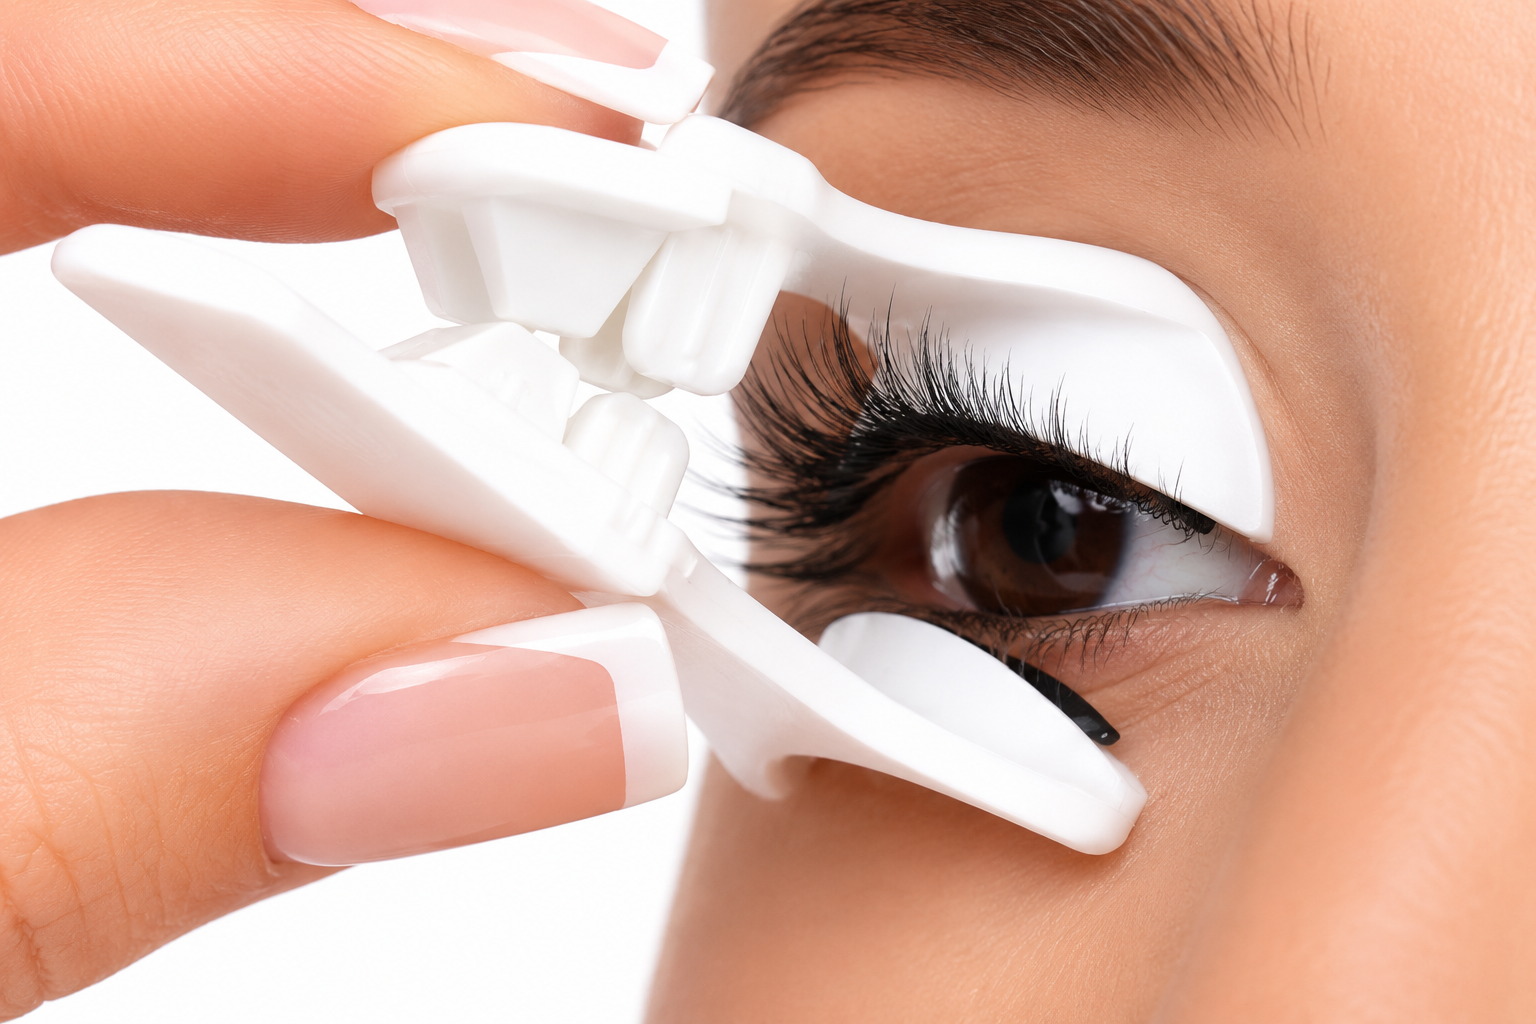
- Tilt head back 45° and look down into the mirror.
- Make sure the top part of the applicator (‘up’) is sitting against the upper eyelid and aligned with your lash line.
- Tilt applicator up to get a better look and press together.
Step 5 - Removing Lashes
Using your fingers, slide magnets in opposite directions and gently pull.
Need help?
Visit our FAQs
Contact us at [email protected]


